- Overview
- Configuration
- NTP4 Plug-In
- Hardware
- RFC 868
- RFC 2030
-
RFC 1305
- RFC 1305
- 1. Introduction
- 1.1 Related Technology
- 2. System Architecture
- 2.1 Implementation Model
- 2.2 Network Configurations
- 3. Network Time Protocol
- 3.1 Data Formats
- 3.2 State Variables and Parameters
- 3.2.1 Common Variables
- 3.2.2 System Variables
- 3.2.3 Peer Variables
- 3.2.4 Packet Variables
- 3.2.5 Clock-Filter Variables
- 3.2.6 Authentication Variables
- 3.2.7 Parameters
- 3.3 Modes of Operation
- 3.4 Event Processing
- 3.4.1 Notation Conventions
- 3.4.2 Transmit Procedure
- 3.4.3 Receive Procedure
- 3.4.4 Packet Procedure
- 3.4.5 Clock-Update Procedure
- 3.4.6 Primary-Clock Procedure
- 3.4.7 Initialization Procedures
- 3.4.7.1 Initialization Procedure
- 3.4.7.2 Initialization-Instantiation Procedure
- 3.4.7.3 Receive-Instantiation Procedure
- 3.4.7.4 Primary Clock-Instantiation Procedure
- 3.4.8 Clear Procedure
- 3.4.9 Poll-Update Procedure
- 3.5 Synchronization Distance Procedure
- 3.6 Access Control Issues
- 4. Filtering and Selection Algorithms
- 4.1 Clock-Filter Procedure
- 4.2 Clock-Selection Procedure
- 4.2.1 Intersection Algorithm
- 4.2.2. Clustering Algorithm
- 5. Local Clocks
- 5.1 Fuzzball Implementation
- 5.2 Gradual Phase Adjustments
- 5.3 Step Phase Adjustments
- 5.4 Implementation Issues
- 6. Acknowledgments
- 7. References
- Appendix A
- Appendix B
- Appendix C
- Appendix D
- Appendix E
- Appendix F
- Appendix G
- Appendix H
- Appendix I
- Time Tools
- NTP Auditor
- About
| Previous Top Next |
Windows Time Server
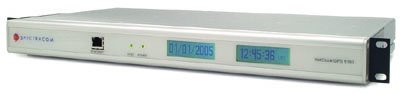
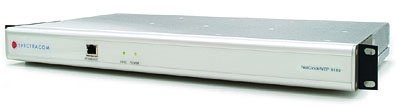
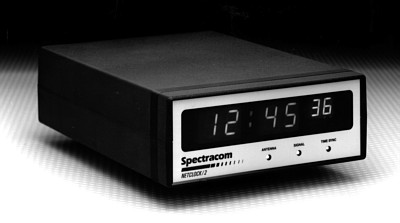
SpectracomSpectracom manufactures both GPS and radio clock receivers. This driver supports the following Spectracom clock models : 9183 (GPS), 9189 (GPS), TTS Series (GPS), 8182 (WWVB), 8183 (GPS), 8183A (GPS), 8183ES (GPS) and 8189 (GPS). The driver requires the Spectracom clock to be configured to employ data format 0 or 3 using 24 hour time, no automatic daylight savings time correction, and 9600 bps. Older Spectracom clock models feature DIP switches whereas newer models are configured via a dedicated telnet, serial port connection or web browser.
Spectracom 9183
Spectracom 9189
Spectracom 8189
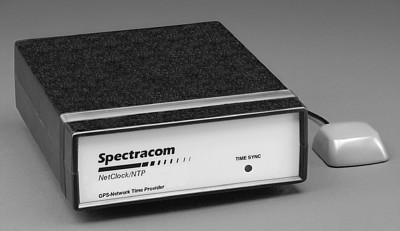
Spectracom 8182
Spectracom 8183
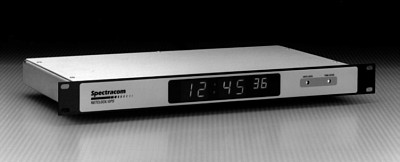
Images reproduced with permission from Spectracom Corporation.
Configuration:
Here are some examples of configuring Spectracom products.
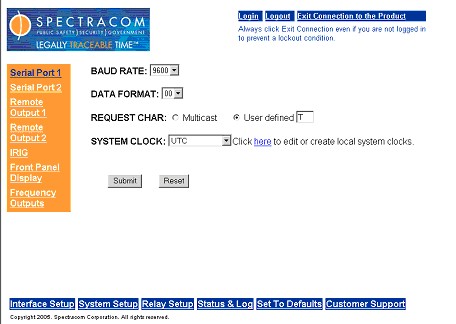
Via Web Browser
Click on interface setup tab at the bottom of the screen.
Click on the desired serial port on the left-hand of the screen.
Set baud rate at 9600, data format to 00, request character to user defined as 'T', and system clock as UTC.
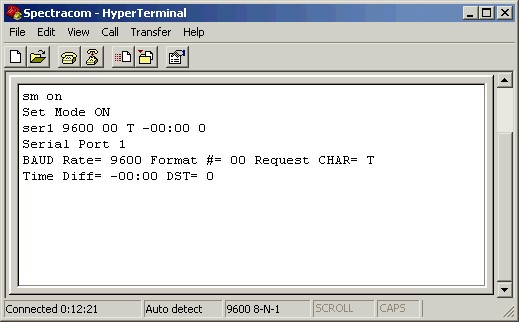
Via Serial Port
Connect a serial cable from your computer to the RS-232 setup port and open a HyperTerminal session using the following parameters : 9600 bits per second, 8 data bits, no parity and flow control Xon / Xoff. This will allow you to configure the operation of your Spectracom clock. Type "sm on" and hit enter to enter setup mode for the serial interface. Then type "ser1 9600 00 T -00.00 0" and hit enter to configure the clock to respond to the polling character "T" using 9600 bits per second. Close the HyperTerminal session, saving the operating parameters for your Spectracom clock.
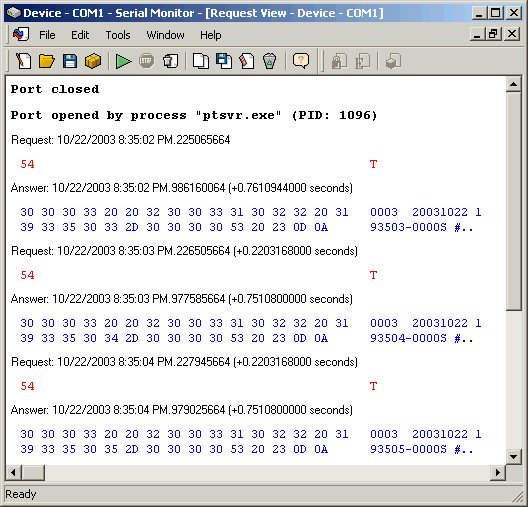
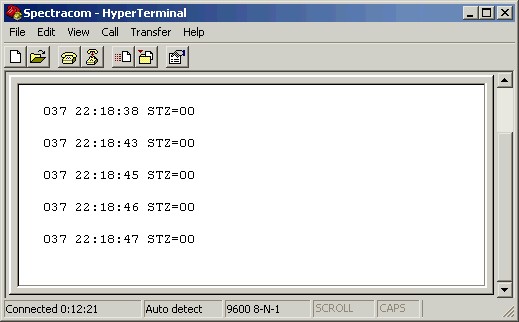
You should now be able to verify operation of your clock by disconnecting the serial cable from the RS-232 setup port and connecting it to the RS-232 communication (COM) port. Re-open your HyperTerminal session and repeatedly hit capital "T" on your keyboard. This should prompt the clock to reply with one time stamp for each key press as shown below. Close your HyperTerminal session.
When your Spectracom clock is synchronized to satellites in geostationary orbit, the time sync LED on the front panel will change color from red to green. You are now ready to start synchronizing your computer to your satellite clock using PresenTense Time Server.
Driver tunables :
Tunable |
Values/Units |
Description |
time1 |
seconds |
offset calibration factor |
stratum |
0-15 |
server stratum, default 0 |
refid |
one to four letters |
server identifier, default WWVB |
Spectracom Clock Formats
Spectracom Netclocks® support a variety of data formats. The NTP4 Plug-In Driver supports format zero and format three. The screenshots below show the real-time interaction between PresenTense Time Server and a Spectracom NetClock using data format zero and data format three. This data is provided for reference and troubleshooting purposes only. See NTP4 Plug-In Driver Calibration and NTP4 Plug-In Driver Troubleshooting for more information.
Data Format Zero

Data Format Three